 |
| Installing Kali Linux on an Old MacBook Pro |
Kali Linux is a widespread distribution for penetration testing and ethical hacking. However, installing it on an older MacBook Pro can be a challenge due to the hardware limitations of the device. This article provides a step-by-step guide on installing Kali Linux on an old MacBook Pro and tips to optimize its performance.
Step 1: Disk Partitions
Before installing Kali Linux, it is important to create disk partitions to allocate space for the operating system and data. Here's how to do it:
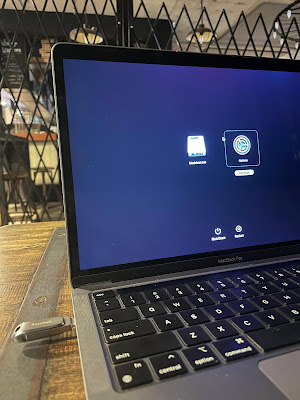
- Boot your MacBook Pro from the Kali Linux installation disk.
- When the installer loads, select “Graphical Install” and choose your language, keyboard layout, and location.
- Select “Guided – use entire disk” and choose the disk you want to install Kali Linux on.
- In the “Partition disks” section, select “Manual” and create the following partitions:
- a. A root partition with at least 20 GB of space and the “ext4” file system. This partition will be used to store the operating system and applications.
- b. A swap partition with at least 2 GB of space and the “swap” file system. This partition will be used as virtual memory.
- c. A home partition with the remaining space and the “ext4” file system. This partition will be used to store user data and files.
- Complete the partitioning process and proceed with the installation.
Step 2: Install Kali Linux
- After creating the disk partitions, you can proceed with the installation of Kali Linux:
- Fill in the details for the hostname, domain name, root password, and user account.
- Select “Yes” to install the GRUB bootloader.
- Select “Finish partitioning and write changes to disk” and choose “Yes” to confirm the partition changes.
- Wait for the installation to complete and restart your MacBook Pro.
Step 3: Optimize Performance
To optimize the performance of Kali Linux on an old MacBook Pro, you can follow these tips:
- Install lightweight desktop environments such as Xfce or LXDE instead of the default GNOME environment.
- Limit the number of services and applications running in the background.
- Make sure that your system is up-to-date by regularly updating the packages and the kernel.
- Use a solid-state drive (SSD) instead of a hard disk drive (HDD) to improve the overall performance of your system.
Conclusion
Installing Kali Linux on an old MacBook Pro can be a challenging task, but with the right approach and optimizations, it can run smoothly and provide a stable platform for penetration testing and ethical hacking. Following the steps outlined in this article and implementing the performance optimization tips, you can install Kali Linux on your old MacBook Pro and use its powerful tools and features.
Hashtags: #KaliLinux #MacBookPro #InstallationGuide #PerformanceTips #PenetrationTesting #EthicalHacking